Joel Adria
Technical Services
  • Home
  • Projects
  • Contact

Link Aggregation with PowerConnect 2724
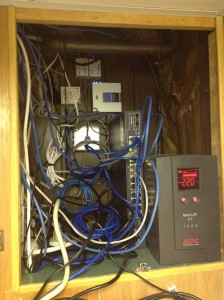
A stock photograph of my network closet. Server located below.

A while back I got a hold of a Dell PowerConnect 2724 Gigabit Managed switch (24 ports) for home use. It has a web-based UI to administer it, which makes it easy to manage. Although it only seems to work with Firefox due to some awkward login methods, overall it works just fine considering you aren’t managing it on a day to day basis.

One advantage of using a managed switch over an unmanaged switch (typically seen in consumer/home use application) is the ability to create aggregate links, which has many different names but is classified under the IEEE 802.1ax and 802.3ad standards.

So what is an aggregate link?

Link aggregation is a computer networking term to describe various methods of combining (aggregating) multiple network connections in parallel to increase throughput beyond what a single connection could sustain, and to provide redundancy in case one of the links fails.

Courtesy: Wikipedia

In my case, my Hackintosh has two separate gigabit network interfaces on it’s ASUS P5W DH motherboard, allowing me to plug in two network cables into it, both plugged into my PowerConnect. They act as one network connection at a theoretical speed of 2 Gbps, or double what a single link would have.

As to whether 2 Gbps is even required for my use, that’s debatable. I just think it’s awesome 🙂

Configuration & testing

What was odd was that in order for Mac OS X to recognize both devices in the link, I needed to make sure only one was assigned to the LAG in the PowerConnect configuration page. The server is connected on ports 1 & 2 of the switch, and as soon as I added both ports to the Link Aggregate group, one of the devices in OS X would report that it did not support 802.3de. I assume this is not standard configuration, but it definitely works. I came accross a forum thread that seemed to be having trouble getting the PowerConnect to talk to OS X, so perhaps this is the solution they are looking for. The trick is to only assign one of the ports to the LAG group, and leave the other port configured normally.
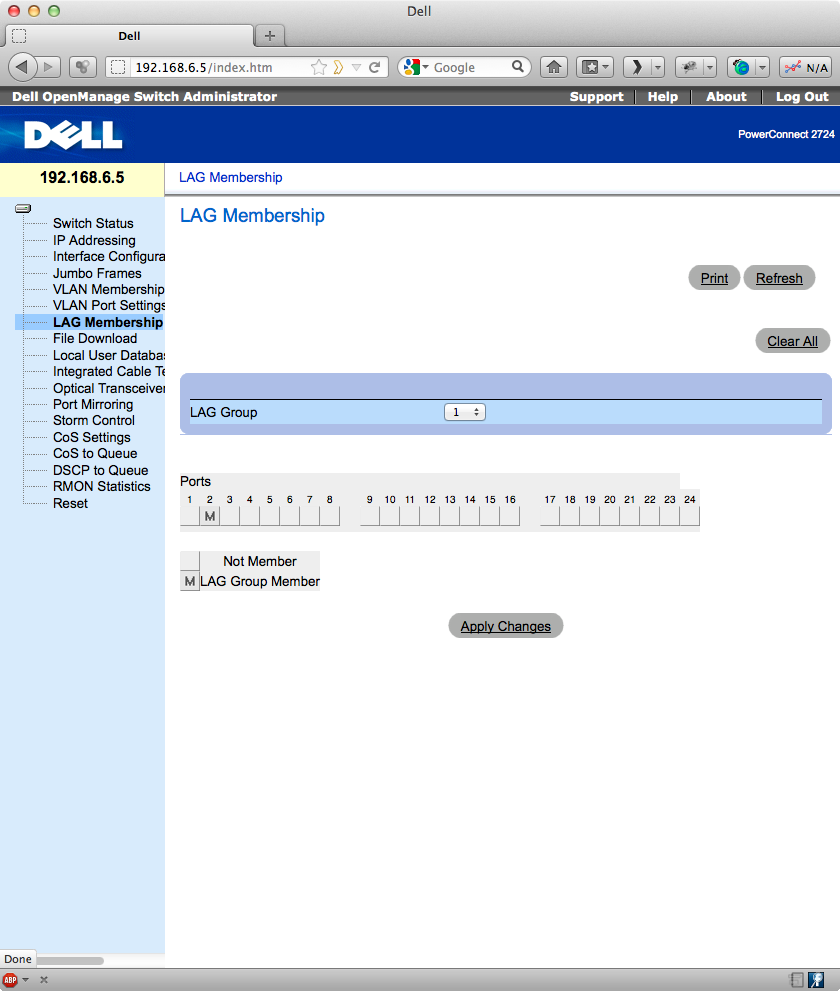
Suggested PowerConnect LAG configuration. Only add one port to the LAG.

To test the link, I ran iperf, an open source utility that streams TCP/IP packets from one computer to another and measures their performance. In order to flood the link aggregate successfully, I’ll need at least 2 computers connecting at gigabit speeds to saturate it.

I ran iperf as follows:

iperf -c 192.168.6.11 -t 60 -P 10 -w 9000

with t being how long it shoudl run in seconds, P being number of threads to run on the machine, and w being the size of the packet, 9000 bytes in this case. I ran it from my MacBook Pro and our family iMac over SSH. All machines had Jumbo Frames enabled, allowing more data to pass in a single packet at once.

The result was a whopping ~200MB/s or about 1.56 Gbps actual network throughput (different from theoretical maximum. Not bad for a quick software-based solution.

If I disconnect one of the links in the above tests, it appropriate dropped in speed by about half, and upon plugging it back in, it came back up to speed. Thus, this also provides link redundancy.

One note for other PowerConnect users though, for somer reason when Jumbo Frames are enabled on the switch and a machine, the Web UI becomes inaccessible. If you need to administer the switch again, simply step down your network interface to 1500 again and it should load.
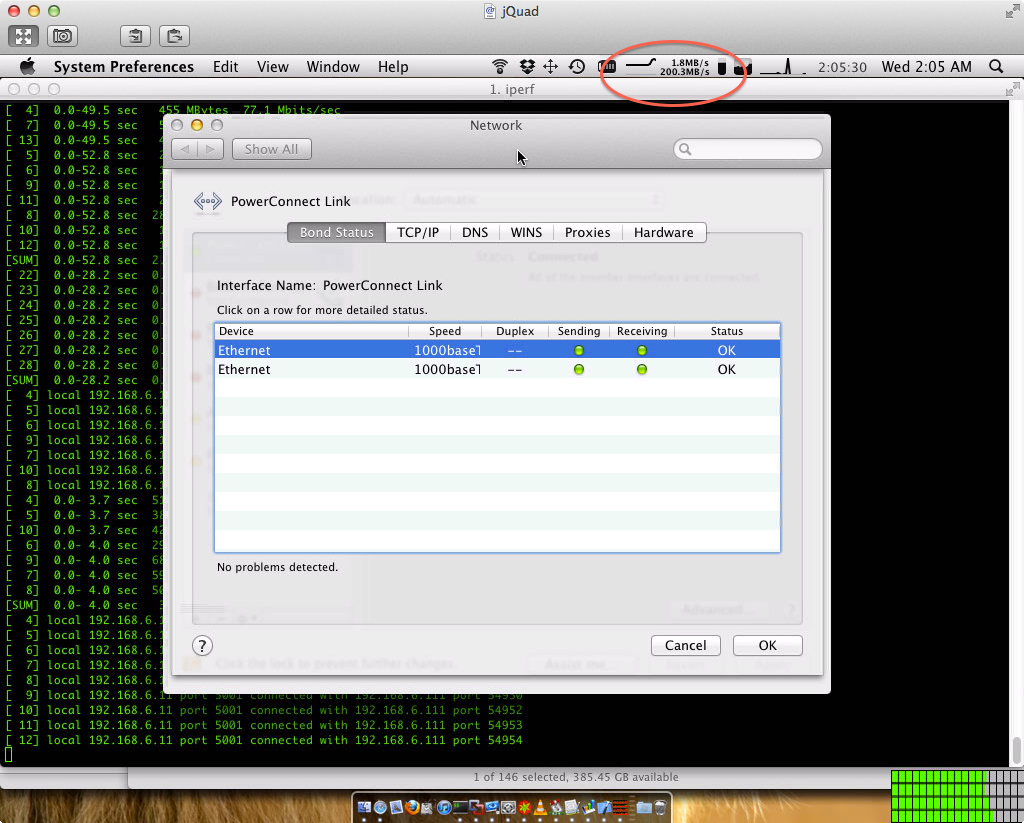
Screenshot of my Hackintosh server admin connection.

Raspberry Pi Lego Case

Full Port AccessAntenna OptionalLiftable Status Monitor WindowLevers Optional EquipmentConnections fit nicelyHDMI port
SD card & power port

Raspberry Pi Lego Case, a set on Flickr.

Via Flickr:
Makerbot 3D Printer: $2000
Plastic Case for RPi: $40
Saturday afternoon playing with Lego: Priceless

Valletta Markdown Editor

I’m not the best person to explain what Markdown is, but if you do a bit of searching you will likely discover the wonders of it. Designed to add formatting to plain text transparently, I think its a great way to keep your text simple while producing well formatted documents for the web and for print.

On the iPhone and iPad I’ve been using Byword pretty faithfully for Dropbox-sync’d text glory. You can preview your documents in Markdown with one push. One thing I wish it had is the extensive (all document) sync every time you open the app the way PlainText does, but maybe that will come soon.

On the Mac, I’ve used the trusty Smultron for quite some time, but the syntax highlighting for Markdown was pretty limited in version 3. I like Smultron’s ability to have many documents loaded up on the left hand side, which makes it much like Byword or PlainText on iOS. Most Markdown editors on the Mac don’t seem to employ tabs for some crazy reason.

My app of choice for now is the fairly unknown Valletta, which allows you to type in plain text on the line you’re writing, and conveniently preview other lines marked down that you haven’t selected, as seen in the screenshot. To me this makes the most sense, as I’m not toggling back and forth to preview, or have a seperate window taking up screen space. The more I thought about it, the more I realized this is also defeats the intention of markdown (to create readable marked up documents) but I still think its a nice way to edit.

What do you use to edit Markdown?

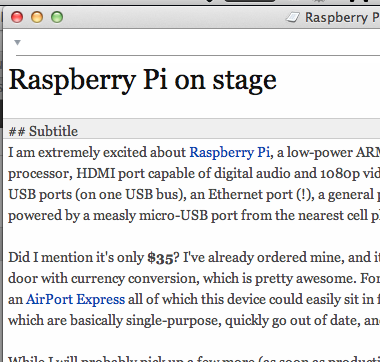
Raspberry Pi on stage

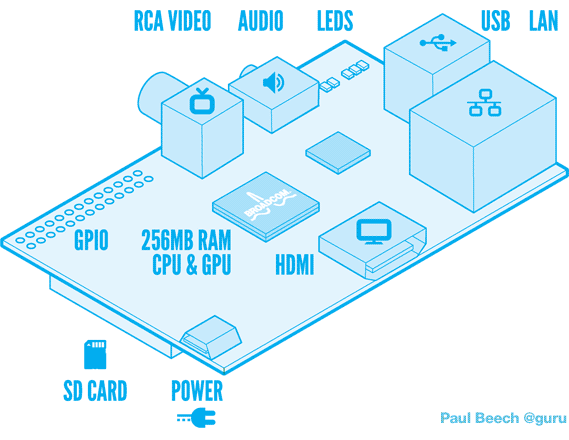
A diagram of the Raspberry Pi board

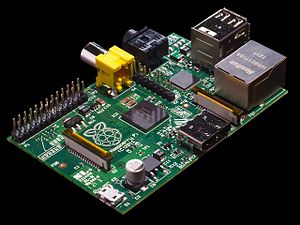
I am extremely excited about Raspberry Pi, a low-power ARM-based Linux box on-a-board. This little board has a Broadcom ARM processor, HDMI port capable of digital audio and 1080p video playback (!), analog audio output, composite video output, a pair of USB ports (on one USB bus), an Ethernet port (!), a general purpose I/O bus, an SD card reader for system software, and it is all powered by a measly micro-USB port from the nearest cell phone charger (or batteries!).

Did I mention it’s only $35? I’ve already ordered mine, and it should arrive in a few weeks. In total, it cost $45 CAD to ship to my door with currency conversion, which is pretty awesome. For that price, I couldn’t even buy an Apple TV, or a Roku SoundBridge, or an AirPort Express all of which this device could easily sit in for. I have acquired many different media gadgets over the years, all of which are basically single-purpose, quickly go out of date, and would be super awesome if they could be hacked to do more things.

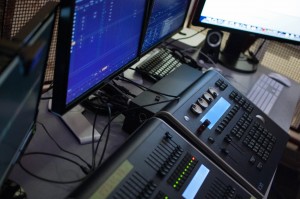
While I will probably pick up a few more (as soon as production starts to meet demand) for various media and automation tasks around the house, my main point of interest is how this device can be used on the stage. A computer this sized blows away what we could do a few years ago with Arduino, allowing us to put the power of a desktop computer inside pieces of set, on performers, and even in the hands of the audience.

The Raspberry Pi board itself.

It also becomes the most universal “problem solver” box ever. Plug in a USB MIDI adapter and you’ve got yourself an OSC to MIDI converter. Add on some physical sensors and its now an infrared MIDI controller. Add on an Entec DMX Device and you’re controlling your lighting rig on a board the size of your palm.

But what about video? The Linux and Open Source community have been busy writing beautiful video software like VLC for a long time, so who is to say these devices aren’t our next media servers? A quick word of caution, I’m mostly talking about “indie” theatre, or productions whos budgets typically fit within the cost of a single license to higher-end video playback systems such as Watch Out. However I think there’s tremendous potential in an array Raspberry Pis networked for live video playback at a fraction of the cost of current solutions.

I’ll be sure to post more when I get my personal Raspberry Pi. What would you use it for?

HUB Mall LED Lighting Competition

Back in March I helped out and participated in the HUB Mall Lighting Design competition, organized by Mel Geary.

The goal of the competition was to encourage experimentation with the new ETC Ion lighting console purchased for the FAB Media Room, while also allowing students to explore moving light fixtures, lighting pre-viz using ESP Vision, experiment with possibilities of the HUB Mall LED lighting rig, and of course to spur a bit of department competition!

My design was a series of chase effects programmed as step cues on the ETC Ion, all fired through QLab using Midi Show Control, timed to the music video, I Love Cats by schmoyoho. I also built the entire show exclusively using the off-line editor.

The winning design by first year BFA Theatre Designers Camille Maltais and Cheyenne Sykes earned them a free 1-year license of ESP Vision.

Overall it was a great experience, and plenty of HUB Mall residents poked their heads out to check out the shows. Typically the LEDs installed are operated at less than half their potential output, so the full-intensity fixtures were quite dramatic. We did have a few issues with some fixtures not responding correctly over DMX, probably due to the length of the runs and speed of data changes used. The wireless DMX transmitters/receivers we used to link our control station and the projection/I-Cue station setup mid-mall worked well though.

Check out the video Mel produced, or some of the photos I shot during the event, below.

untitled shoot-2742untitled shoot-3971untitled shoot-3975untitled shoot-3976untitled shoot-3988untitled shoot-3989
untitled shoot-3990untitled shoot-3991untitled shoot-3999untitled shoot-4005untitled shoot-4009untitled shoot-4020
untitled shoot-4040untitled shoot-4048untitled shoot-4054untitled shoot-4056untitled shoot-4057untitled shoot-4068

HUB Mall LED Lighting Competition, a set on Flickr.

Light: Interactive Worship Experience

OverviewThree ProjectorsThree CamerasThree screensPlay timeResponsive Light
ScriptureCamera AnglesLinen ScreenLED ParsCampers ReflectFour Arms
Campers ExploreStitchingRehearsalColor ChangesSetupEquipment

Light: Interactive Worship Experience, a set on Flickr.

During my time at Gull Lake Centre, I put together an interactive worship experience during Senior Teens 2012. Put together in just a day using equipment on hand, the installation focussed on the theme of “light” in scripture, both in word and in environment.

Three LED PARs lit the room in different colors, and responded to the voices of people sitting in the room, as well as movement on the three video cameras. Verses could be read aloud, which colored the screens. Three video cameras captured movement in a unique way and relayed them to the three projectors.

Elise LeBlanc in Concert


concert-1-6468concert-1-6472concert-1-6474concert-1-6478concert-1-6484concert-1-6490
concert-1-6495concert-1-6498concert-1-6506concert-1-6507concert-1-6508concert-1-6514
concert-1-6516concert-1-6517concert-1-6520concert-1-6523concert-1-6527concert-1-6530
concert-1-6534concert-1-6535concert-1-6536concert-1-6541concert-1-6542concert-1-6544

Elise LeBlanc in Concert, a set on Flickr.

Via Flickr:
Folk artist Elise LeBlanc performs for LTDs (Leaders in Training and Discipleship) on the beach at Gull Lake Centre near Lacombe, AB.

I have been working at Gull Lake Centre for the summer, putting together videos and shooting photos for all the campers who come through the gates. It has been a wonderful opportunity to practice my photography, especially on days like these!

Wave Launch


Wave at last
Awaiting Wave Launch TimeA view of the renga poetry, part of WaveWave is up!First WavelingsEarly Interactors
Wave in Enterprise SquareWave Artist & Authors ConvenePatrons Observe Wave at OpeningA Patron Scans a QR Code OnscreenA Patron Scans a QR code on her Smartphone
Wavelings observe version 1.0 at launchSystem Architect Joel Adria explains Wave to a patronSystem Architect Joel Adria demos Wave to a patronChair, Marco Adria experiments with WaveMarco Adria, Chair, demoes Wave to a patronJoel Adria, System Architect, poses with patron, Kevin Lau
Joel and Kevin discussing Wave technologiesMarco Adria, Chair, explains Wave to Dean of Extension, Katy CampbellKevin experiments with Wave on an iPadDesigner, Cezary Gajeski and Joel Adria reflect on future revisionf of Wave

Wave Launch, a set on Flickr.

Via Flickr:
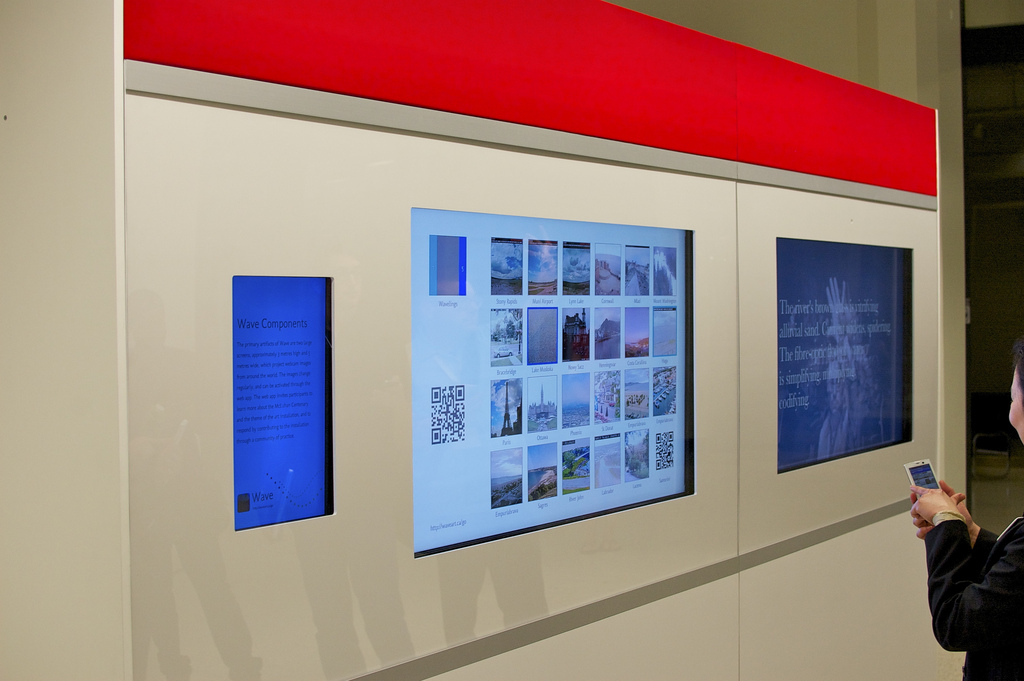
The Wave Art & Media Installation was launched on Thursday June 23, 2011 as part of the McLuhan Centenary and the Media Ecology Convention 2011 in Edmonton Alberta.

Wave was unveiled in the atrium of Enterprise Square (old Bay building in Downtown Edmonton, owned by U of A). Several convention attendees and students of the MACT program, along with friends and colleagues attended the launch and tried their hand at being a “waveling.”

Wavelings can connect via their smartphones, tablets, or traditional computers to a special web app, which allows them to explore webcams from all over the world, based on the McLuhan concept, “the global village.”

They can also view their image as a silhouette amongst a series of “renga” poetry written for Wave. This interaction explores McLuhan’s “the medium is the message.”

The Wave will be in Enterprise Square until November 2011, and will be continually updated and developed with software and hardware updates though out its stay. Stay tuned to the @wave_art twitter page for the latest news.

Thanks to Jeremy Keay for shooting the photos.

New 35mm Nikon AF-S 1.8G Prime Lens

I finally opted to re-invest in some new photography equipment, this time in the optical area.

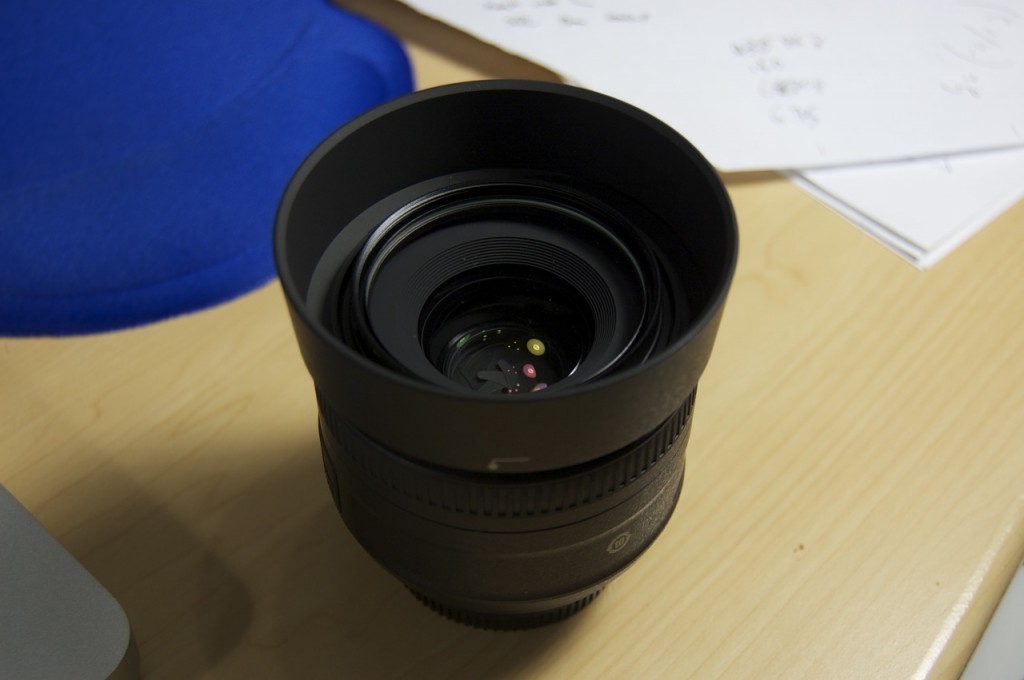
New Nikon 35mm F1.8 Lens

I contemplated between the new 55mm and the 35mm, since the 55mm certainly has a unique close-up perspective (and from what I understand a slightly better portrait shot) but since I already have a 55mm in manual form, and 35mm seemed a bit more versatile, I opted for it in the end.

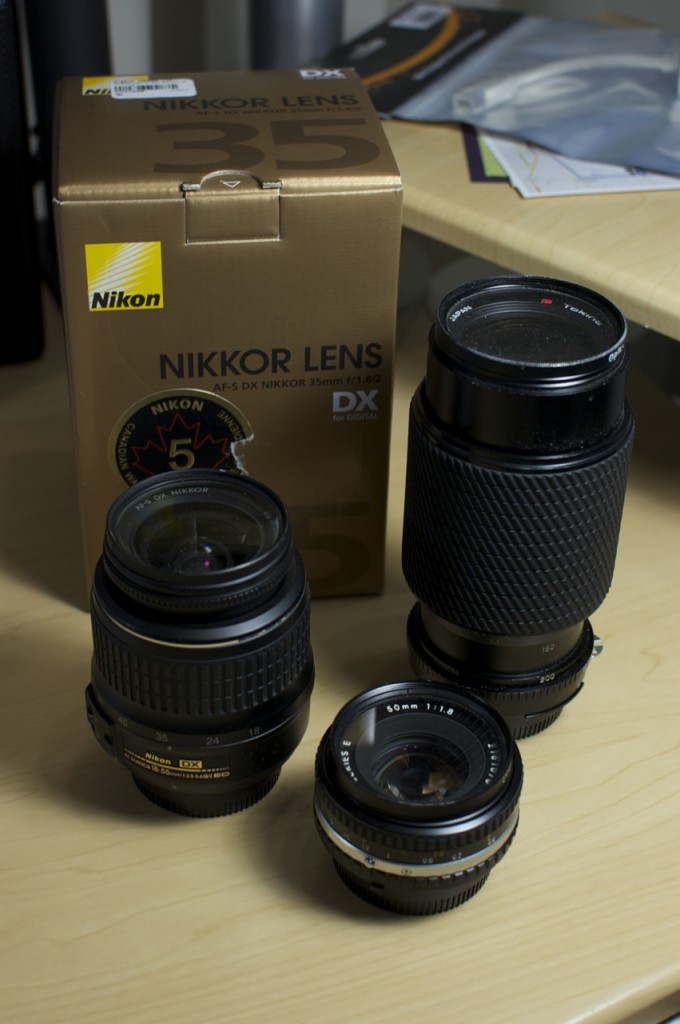
Nikon E-series 50mm F1.8 (film, full manual) Tokina 80-200mm F4.5 (film, full manual) Nikon 18-55mm F3.5-5.6 (kit, full auto)

Most of my comparisons will be to the kit lens my D40 came with, the 18-55mm stock zoom that is pretty much the cheapest lens Nikon sells. My first impressions are that this thing produces very sharp pictures. Perhaps I just haven’t picked up my DSLR in a while, perhaps I just haven’t been using RAW often enough, but these look pretty sharp to me. Thanks to the F1.8 aperture size, plenty of light can enter the camera in low light, which makes it easier to capture a shot without dropping shutter speed to blurry-inducing levels, or increasing the ISO on the rather limited sensor of the D40.

To compare, check out the two shots below, first with the 18-55mm at about 35mm at F4.6 (largest allowed at this zoom point) and 1/200 shutter speed. The next is the same image shot wide open (F1.8) with the 35mm prime. Both were shot at ISO 800 on the D40.


Shot with 18-55 Kit lens (F4.5 1/200 800)
Shot with 35mm prime lens (F1.8 1/200 800)

My goal was to be able to shoot in lower light without being forced into high ISO ranges, so this should help out quite a bit.

Check out more shots of the day on the Flickr set.

Sharpness test!Through the eye of the oldCondimentsCutieChips
ConcernedNew Nikon 35mm F1.8GRest of the collection

Fun with new 35mm, a set on Flickr.

TV Wall on display at EIA

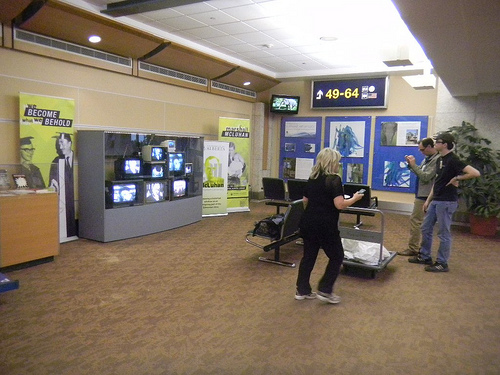
As part of the McLuhan Centenary 2011, the Vintage TV Wall is now on display in the departures area at Edmonton’s International Airport. The Wall plays back a variety of clips from McLuhan’s legacy, encouraging patrons to reflect on his well-known themes of “the medium is the message” and “the global village”.

Originally put together to promote the final Wave installation, the TV wall was shown at the Cool Media event at the Art Gallery of Alberta. TVs and equipment were contributed from Kevin Lau’s personal collection, and content and design were my responsibility. The display case created for the airport was put together by Cezary Gajewski, an industrial designer at the University of Alberta.

The display is in the domestic departures area past security, so you’ll need to take a flight sometime between now and November. After that it will be viewable in Enterprise Square downtown until January, alongside the final Wave installation.

Be sure to check out the Flickr set I’ve posted of the entire process, along with a video or two on the YouTube channel.

< 1 2 3 4 5 >»

Recent Posts

  • Flora Digital Greenhouse
  • Looking back from the road
  • New Year, New Look
  • Navigating Helen Lawrence
  • Mavericks, App Nap, and Theatre Software

Archives

Categories

  • Apple
  • Bearbook
  • Duck Podcast
  • Edmonton
  • Featured
  • flickrer
  • Gadgets
  • Gallery
  • Interactve
  • joleblog
  • jolephoto
  • PC
  • Personal
  • Photo
  • Podcast
  • Tech Theatre
  • Video
  • Website
  • Whiteboard of the Week
  • Home
  • Projects
  • Contact
© Joel Adria 2025
Powered by WordPress • Themify WordPress Themes