Link Aggregation with PowerConnect 2724

A while back I got a hold of a Dell PowerConnect 2724 Gigabit Managed switch (24 ports) for home use. It has a web-based UI to administer it, which makes it easy to manage. Although it only seems to work with Firefox due to some awkward login methods, overall it works just fine considering you aren’t managing it on a day to day basis.
One advantage of using a managed switch over an unmanaged switch (typically seen in consumer/home use application) is the ability to create aggregate links, which has many different names but is classified under the IEEE 802.1ax and 802.3ad standards.
So what is an aggregate link?
Link aggregation is a computer networking term to describe various methods of combining (aggregating) multiple network connections in parallel to increase throughput beyond what a single connection could sustain, and to provide redundancy in case one of the links fails.
Courtesy: Wikipedia
In my case, my Hackintosh has two separate gigabit network interfaces on it’s ASUS P5W DH motherboard, allowing me to plug in two network cables into it, both plugged into my PowerConnect. They act as one network connection at a theoretical speed of 2 Gbps, or double what a single link would have.
As to whether 2 Gbps is even required for my use, that’s debatable. I just think it’s awesome 🙂
Configuration & testing
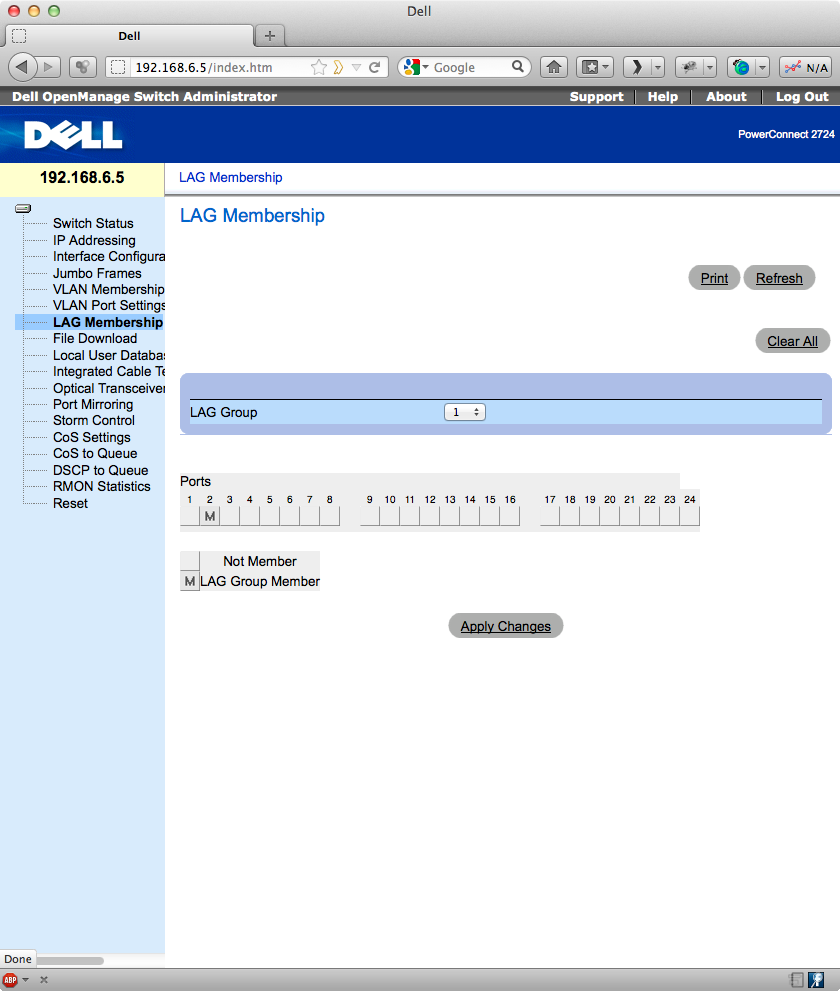
What was odd was that in order for Mac OS X to recognize both devices in the link, I needed to make sure only one was assigned to the LAG in the PowerConnect configuration page. The server is connected on ports 1 & 2 of the switch, and as soon as I added both ports to the Link Aggregate group, one of the devices in OS X would report that it did not support 802.3de. I assume this is not standard configuration, but it definitely works. I came accross a forum thread that seemed to be having trouble getting the PowerConnect to talk to OS X, so perhaps this is the solution they are looking for. The trick is to only assign one of the ports to the LAG group, and leave the other port configured normally.

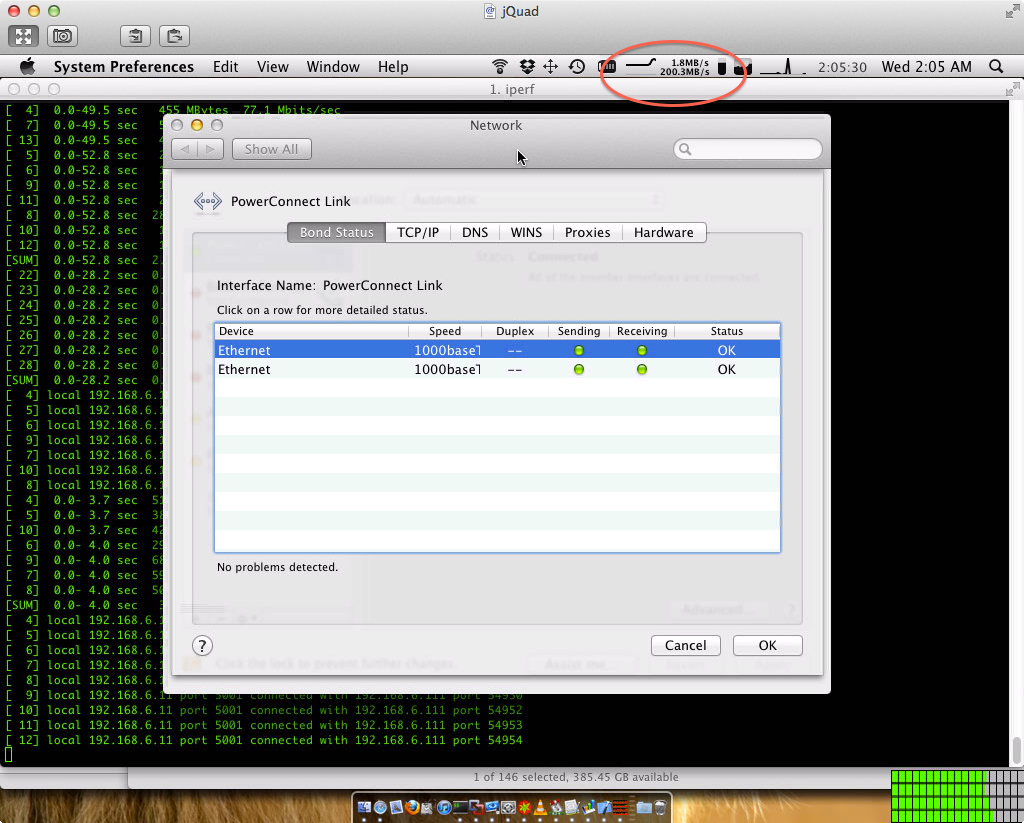
To test the link, I ran iperf, an open source utility that streams TCP/IP packets from one computer to another and measures their performance. In order to flood the link aggregate successfully, I’ll need at least 2 computers connecting at gigabit speeds to saturate it.
I ran iperf as follows:
iperf -c 192.168.6.11 -t 60 -P 10 -w 9000
with t being how long it shoudl run in seconds, P being number of threads to run on the machine, and w being the size of the packet, 9000 bytes in this case. I ran it from my MacBook Pro and our family iMac over SSH. All machines had Jumbo Frames enabled, allowing more data to pass in a single packet at once.
The result was a whopping ~200MB/s or about 1.56 Gbps actual network throughput (different from theoretical maximum. Not bad for a quick software-based solution.
If I disconnect one of the links in the above tests, it appropriate dropped in speed by about half, and upon plugging it back in, it came back up to speed. Thus, this also provides link redundancy.
One note for other PowerConnect users though, for somer reason when Jumbo Frames are enabled on the switch and a machine, the Web UI becomes inaccessible. If you need to administer the switch again, simply step down your network interface to 1500 again and it should load.

